
One of LabVIEW’s great strengths is the ease with which you can put together a simple user interface
At some point though, your UI needs will go beyond what can be done with a static control layout
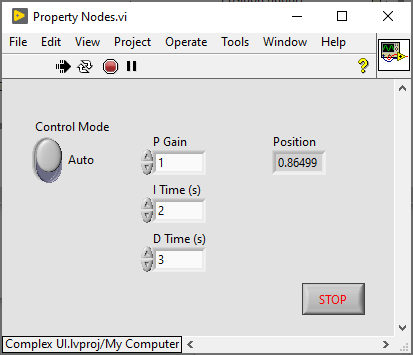
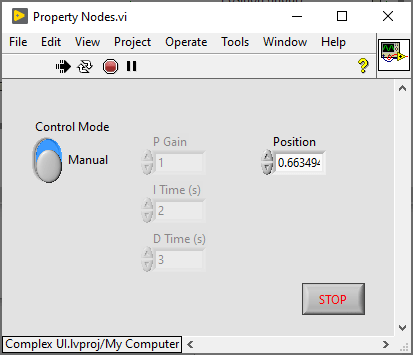
Maybe the user interface has just outgrown what you can sensibly fit into a single front panel. Perhaps you need multiple copies of the same group of controls to display the test results for several devices at once. You might need different sets of controls for normal users and supervisors, or manual and automatic modes
This post introduces five different methods for taming a complex user interface
Showing and Hiding Controls
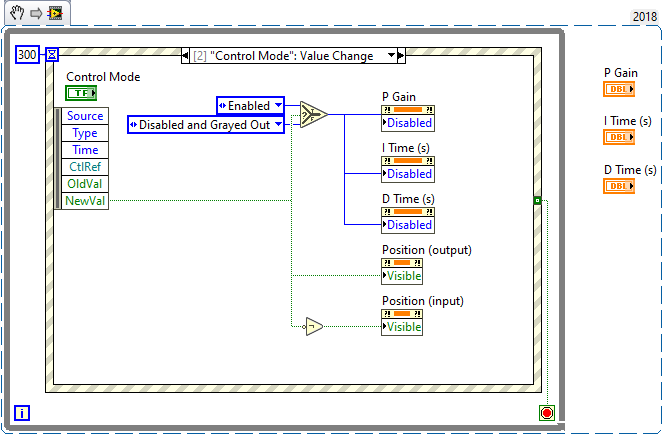
Individual controls and indicators on the front panel can be hidden by setting their Visible property to False. This is the easiest way to change your UI at runtime
This approach works well for simple user interfaces but can become unwieldy if there are a large number of controls, even if most of them are not visible. All of the terminals for the controls will be on the VI’s code diagram, so all of the code to manage them will tend to live there as well.
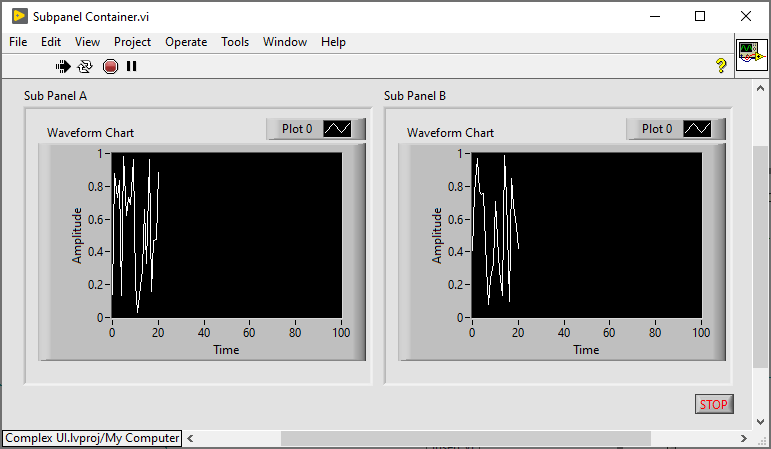
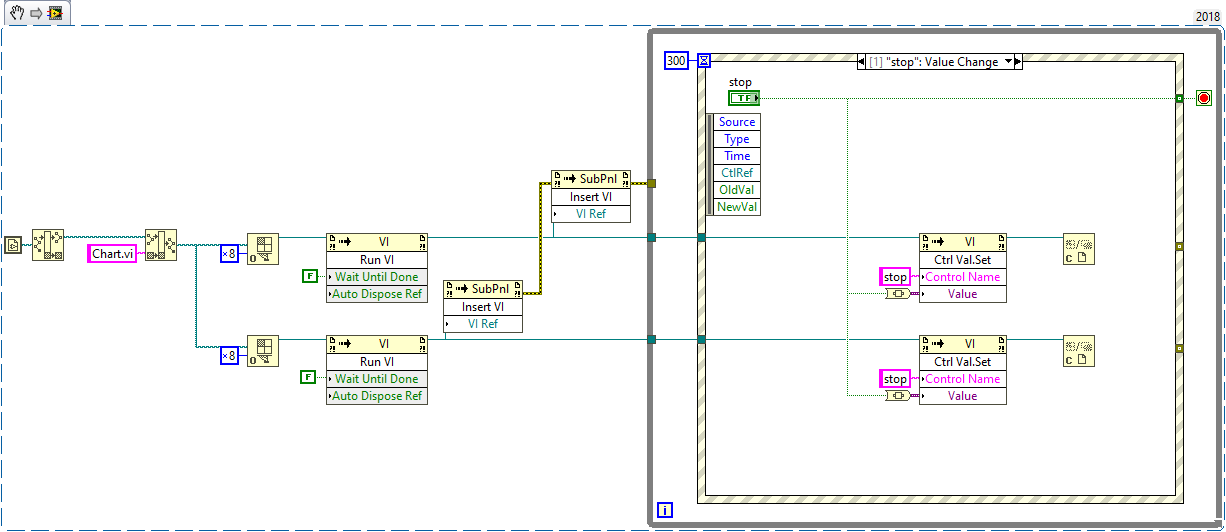
Subpanels
A subpanel allows you to display the front panel of one subVI on the front panel of another VI. This has the benefit of keeping the code for each part of the user interface separate, which helps keep the main VI’s block diagram nice and tidy
In addition, if you make the subpanel VI re-entrant then you can re-use it for multiple subpanels – you just have to make sure to store your data separately from the UI, but this is good practice anyway
You will need to use something like a queue in order to get data into and out of the subVI, but again this sort of decoupling of the UI from the core part of the application is a good idea. An even better idea is to use a framework like DQMH that somebody else has already written and debugged for you, instead of rolling your own communication method. Here’s an example of how to use subpanels with DQMH
Note that the code snippet here won’t actually work, as the subpanel controls get stripped out. The source VIs can be downloaded here as a zip file
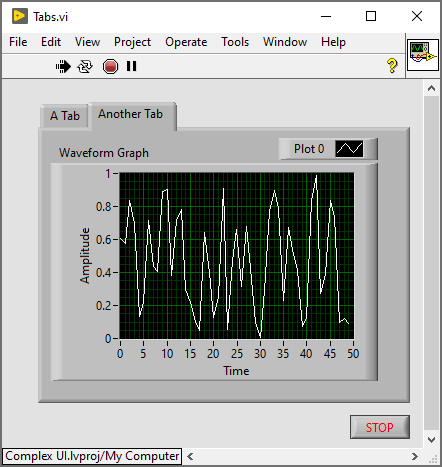
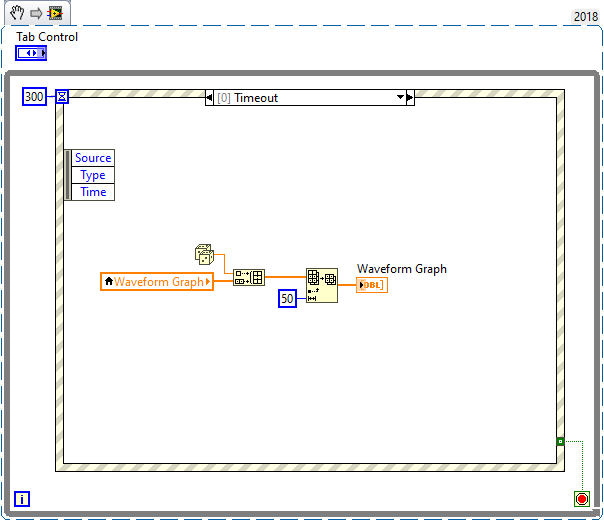
Tabs
Each tab can hold a completely different set of controls and they also come with a handy label. No code is required to show and hide each page’s controls and indicators
They have a similar problem to simple showing/hiding controls with property nodes though, with all of the terminals living on the owning VI’s block diagram. You can combine tabs with subpanels to get around this
Multiple Windows
This can be a good solution if your application has different modes that don’t share any UI. Using multiples windows completely separates each group of controls and you can show and hide the windows as required.
Depending on how your application is architected, the windows may send data back and forth via queues or events, or there may be a hidden VI that’s responsible for managing the flow of data. Again, a framework like DQMH is your friend here
XControls
XControls allow you to create a custom UI element made up of other standard LabVIEW controls. An XControl comes with a standard control terminal that uses whatever type you specify, and you can also add other properties and methods if required.
An XControl is actually running – or at least able to handle events – from when it is first dropped on the front panel. So they can handle edit-time events, and they can change appearance in response to the host VI starting or stopping execution
After creating an XControl they behave much like a native control. They can have default data that is saved in the owning VI and then reloaded whenever the host VI is reloaded
These do come with a couple of important caveats though. XControls can only be created in the Pro version of LabVIEW, and they have a number of sharp edges that mean you should consider carefully if they are a good fit for you and your team before you launch into creating one